|
|
........ SMOOTH ON ALL SIX |
_______________________________________________________________________________________________
Winter 2012-2013
The major upgrades this winter has been to fit new red leather seat covers for the MX5 seats and modify the front trunnions to Canleys trunnionless front suspension kit.
Further maintenance has been done and is listed here:
-
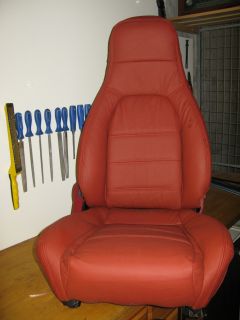
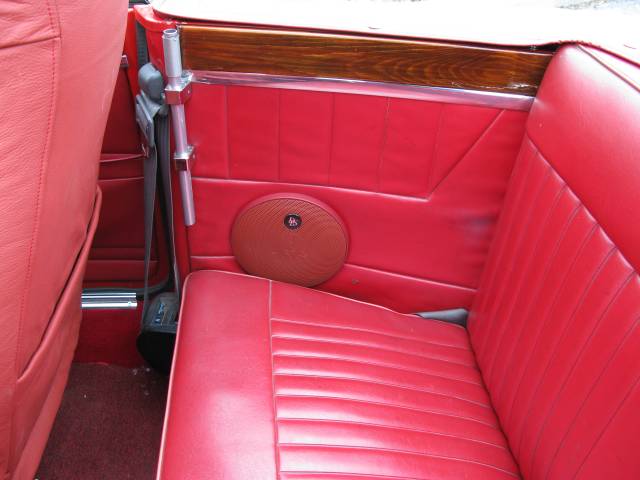
New red leather seat covers on the MX5 seats
-
Changing lock cam mechanism
-
Changing sump gasket and fitting steel sealing block
-
-
Fitted new speedo angle drive
-
Modify to Canleys trunnionless front suspension kit
-
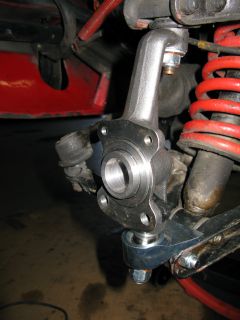
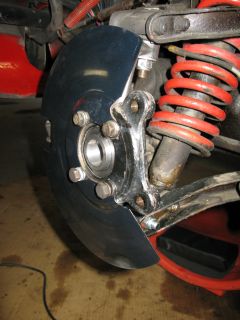
Fitted polished steel brake dust shields
-
Fitted speakers in the rear quarter panel
-
Fitted original latch to the under dash storage box
Again the Vitesse is ready for maintenance, upgrades and of course TLC J
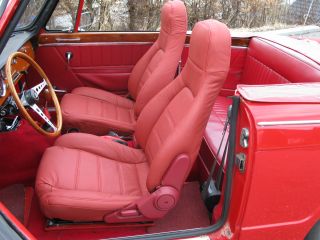
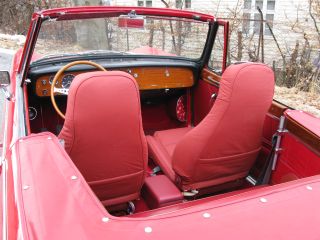
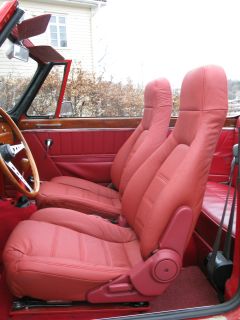
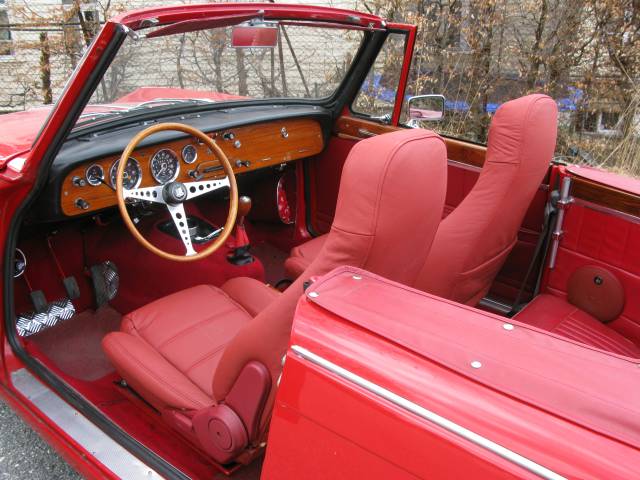
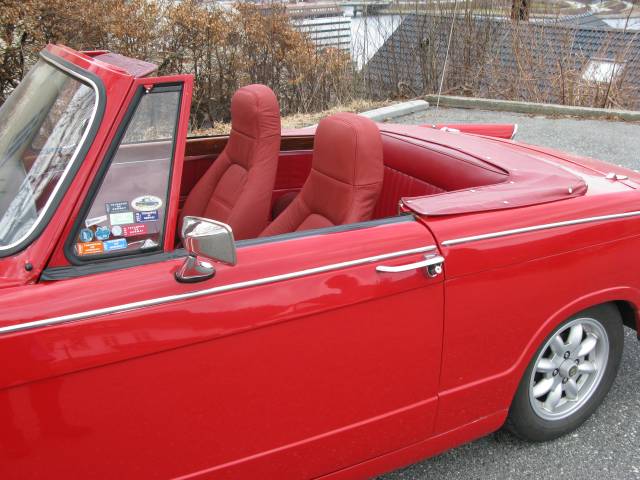
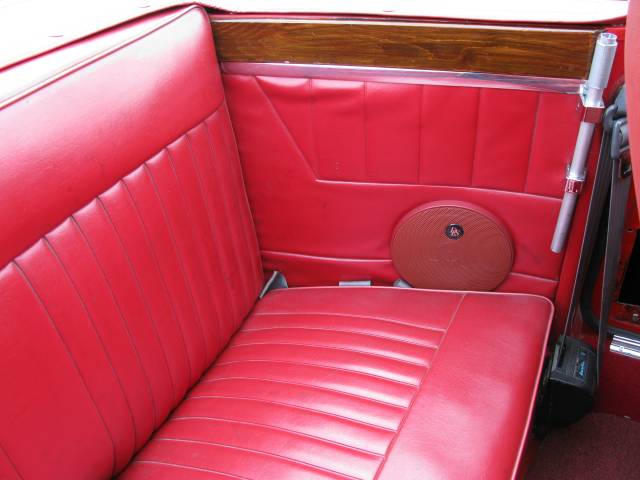
Red leather seat covers for the MX5 seats
I got hold of a set of MX5/Miata red leather seat covers on eBay - a lot cheaper than other dealers/vendors. The fit was very good – tight and hence a bit fiddle to do the job. I’m very satisfied with the fit, but the color should be a bit redder – in my opinion. Anyway, by help of a mate we were able to fit the covers nicely. Just breath deep, do not rush – take your time (and a bit more time), rest and continue J
Browsing the net I found a very good guideline of how to do it – and how to not do it: http://www.miata.net/garage/upholstery.html . A pdf-file can also be found here. I would recommend following this strictly and taking many pictures when removing the old covers – just to remember how they were fitted. The only thing a may say could be negative with these covers are the strips of vinyl with the nylon cord along the edge – these seems to be a bit weak, but none of them were unstitched during the mounting. I X-fingers that they will not unstitch when the seats are used during the coming season. I did not use metal hog-rings to fit the cover to the seat cushion but used the provided plastic strips. Some will say that these may fracture and break after years, but they are very much easier to use when fitting the covers as you do not have much space when these are fitted. All in all it went very well – and, yes – I spend a couple of weekends for doing both seats.
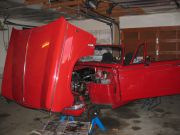
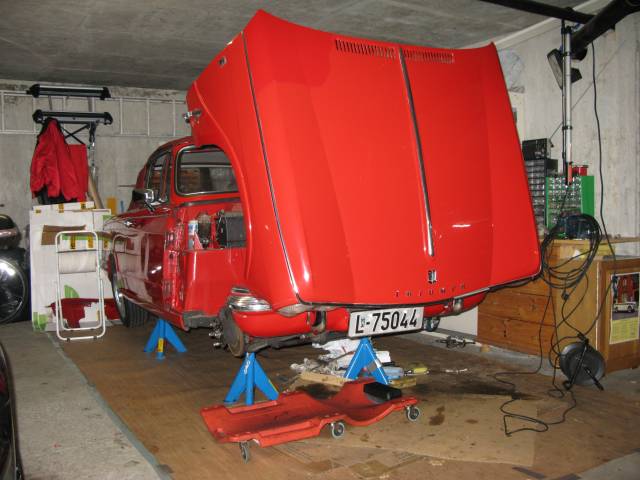
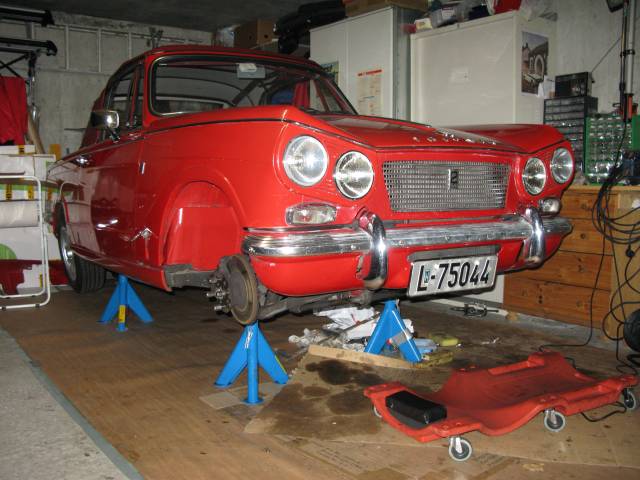
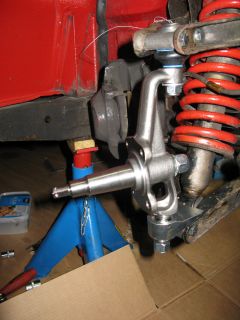
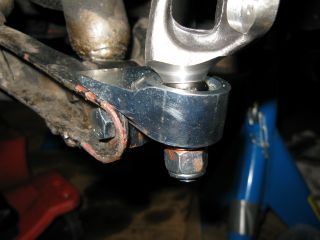
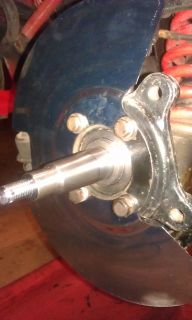
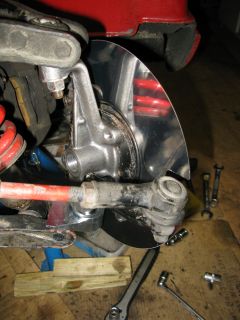
Modify to Canley trunnionless front suspension
When the Vitesse flew though the EU-kontroll (Norwegian MOT) last year, a small play (not enough for MOT-failure) was observed in the right front trunnion. I then decided to modify these with trunnionless kit provided by Canley: http://www.canleyclassics.com/?xhtml=xhtml/product/catkit1.html&xsl=product.xsl. I also changed the track rod ends due to some wear of the rubber, stub axles, top ball joints and stainless steel brake dust covers. The change was straight forward by following the instructions and the workshop manual in general.
Speakers in the rear quarter panel
To further improve the sound of the car stereo I decided to cut the rear quarter panel to fit a couple of 6.5” speakers - http://www.sonicelectronix.com/item_10501_DLS-Classic-226.html. This was done a bit reluctant as they will be visible in addition to cut the panel (however, I got a couple of brand new ones that I’ve not yet fitted). The covers where painted red which somewhat minimize their presence.
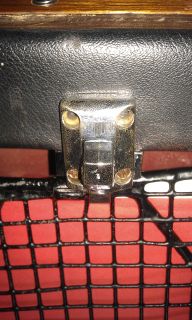
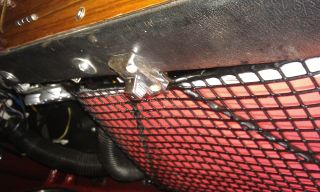
Original latch to the under dash storage box
By browsing eBay I found what was claimed to be an original latch to the under dash storage box. This was located in the US and I’ve been looking for this for year as I’ve just used a home-made and temporary solution myself. This fitted very well – and the Vitesse had already original holes for this and was fitted within minutes. It seems to me that this is original, but I’m not sure as it is not equal to the one described in the book “Complete Guide to Triumph Herald and Vitesse” by Mike Costigan.
Changing lock cam mechanism
During the last years the doors have become more and more difficult to open – both from the inside and outside. I had to give the door a push before the lock would release. I tried several things – adjusting the doors etc. – however I concluded that the lock cam mechanism was probably worn after almost fifty years. These are not available as new (part no.: 706119 – RH, 706118 – LH). By contacting Mick Dolphin he sent me a couple of NOS. They fitted well and now the doors open and close without any trouble.
Changing sump gasket and fitting steel sealing block
Due to some oil leakage from the sump, I changed the sump gasket and also the engine sealing block at the very front of the engine. This is provided by TSSC: http://www.tssc.org.uk/index.php?page=shop.product_details&flypage=shop.flypage_tssc&product_id=3206&category_id=283&manufacturer_id=0&option=com_virtuemart&Itemid=59 . It is around this area there is some leakage – so X-fingers that it will be tight…… I’ve removed the sump before with the engine in the car, and the description is found here.
Engine Sealing Block
Speedo gear seals and fitting new speedo drive angle
There has been some minor leakage from the speedo-drive the last years, and this winter I decided to change all the possible seals. These are the parts shown in the below drawing: no. 96 copper washer that seals the speedo dowel screw no. 95, further the O-ring no. 92 and no. 93 – the seal speedo pinion. All these are in stock from most Triumph dealers and the full drawing is shown here. When doing this I also changed the speedo drive angle even though the old unit was not worn. It is relatively much work to change these seals as the front interior carpets must be removed together with the gear box tunnel. Further to get proper hold of the speedo dowel screw I had to release the exhaust pipe in the front – and hence fit a new downpipe gasket. Other than that – it was straight forward.
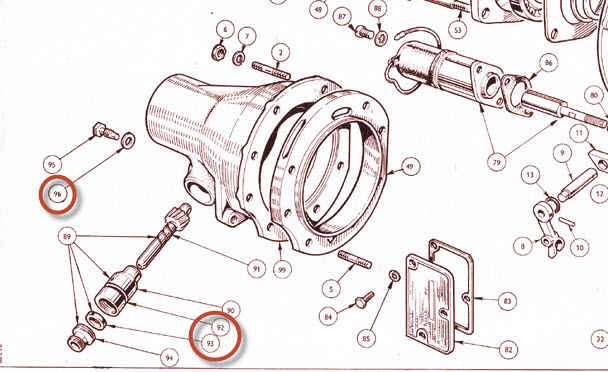
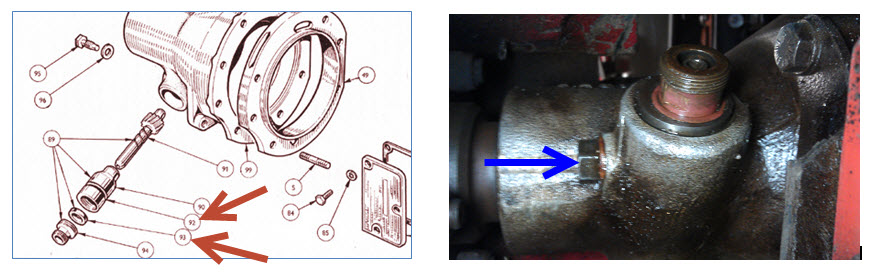
Seen underneath - the speedo dowel screw, part no. 95
Other - TLC
Changed LH boot lid hinge |